

Using the Email Designer
Description
This is the main editing tool you'll use to create an email template; it's easy to use and allows for quick addition and removal of sections, setting different colors for different areas, deciding on the font and width of your campaign, testing and much more, all from a single window.
Why It's Important
This editing function allows users to create engaging email campaigns without writing code to accomplish any desired goal. With this tool, anyone can make an excellent email. The email designer is now more flexible with section moving, content reorganization, color picker functionality, and content versioning. Here we'll explore everything about our designer.
Step-by-Step Instructions
Here are some features of this tool to get started and use it to its full potential.
Settings
This part is for setting the tone for the entire campaign. There are many options to consider:
-
Content area width (we recommend not exceeding 600 pixels)
-
Content area alignment. (Left or Center)
-
Background color
-
Content area background color
-
Default font
-
Link color
Add your preheader
To get the most out of your campaign, don't forget to add a compelling preheader. Simply scroll down in your settings to your METADATA, and enter it in the preheader field. It's that simple!
If you need some inspiration, our AI feature is there to help you generate engaging preheaders that resonate with your audience. Give it a try and find the perfect fit for your message.
Rows
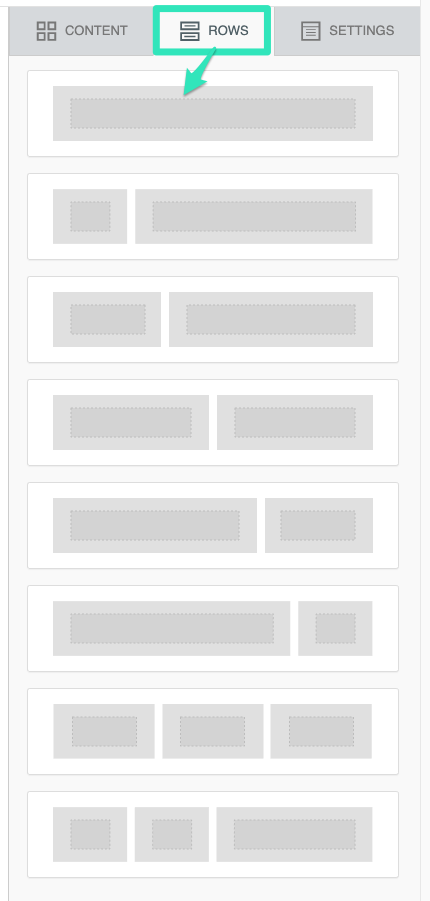
Before adding content to your campaign, you need to choose a row. The Rows section consists of a variety of component structures. Please select the one you want and drag it anywhere in the campaign. Test them and find the one that works best for your template.
Move / Delete / Duplicate row
Reposition, delete, or duplicate a section of the email:
- First, select the row you need to reposition to access its repositioning menu.
To move a section up or down in the template:
- In the positioning menu, click on the crossed arrows found on the left to move your selected row.
To delete a section:
- In the positioning menu, click on the trash icon on the right to delete the row.
To duplicate the row:
- In the positioning menu, click on the double window button on the right, next to the trash icon.
Edit
Several elements can be modified in the row section. Select the row you want to modify to access this menu on the right side of the designer.
Here are the features you can control:
-
Row background color
-
Content background color
-
Don't stack on mobile
-
Row background image
-
Customize column
-
Display condition
-
Hide on Desktop/Mobile
-
Customize columns
-
Column background
-
Padding
-
Borders
Save and reuse a row
Built a row you'll want again, a footer, a social block, a standard header? Save it once and drop it into any future campaign instead of rebuilding it.
To save a row:
- Select the row, then click the Save icon (the disk) in the row's toolbar, next to the duplicate and delete icons.
- Give the row a clear name so you can find it later, then confirm. The row is added to your saved rows for this account.
To reuse a saved row:
Open the Rows tab and use the source dropdown at the top (it starts on Empty):
- Empty, start from one of the blank column layouts.
- Default, the built-in, prebuilt rows.
- My saved row, the rows you've saved. Use the search box to find one by name, then drag it into your campaign.
- Shared row, rows shared across your account, available to everyone on your team.
Each saved row has a Manage row menu to rename or delete it. Reusing saved rows keeps your campaigns consistent, the same footer, header, or social block everywhere, and saves you from rebuilding the same content over and over.
Content
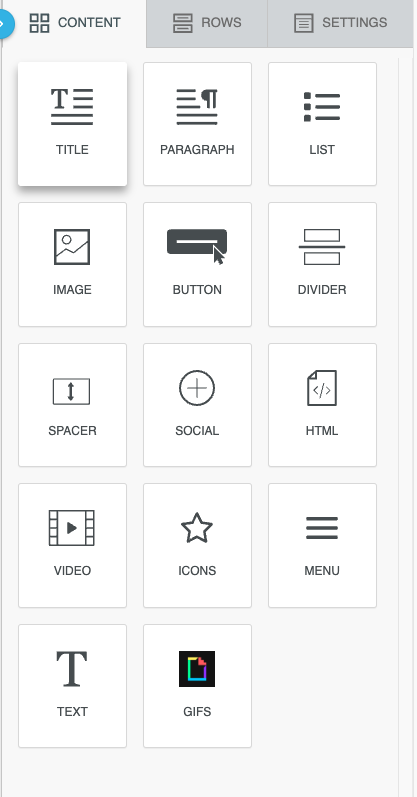
Having decided what type of rows you want, you can now choose what content to include in those rows.
The following content options are available:
-
Title: Use this to insert your campaign title.
-
Paragraph: Use this to insert a paragraph of text.
-
List: Use this to insert a list of different content.
-
Image: Use this to insert an image you've uploaded or a stock image.
-
Button: Use this to insert a visible call-to-action button.
-
Divider: Use this to divide your content.
-
Spacer: This block can insert space into your email content.
-
Social: Insert social media icons and link them to your pages.
-
HTML: Insert your custom HTML code into the editor with this option.
-
Video: Insert a thumbnail showing a preview of your video and a link to it.
-
Menu: Use this to include an interactive menu in your email content.
-
GIFS: Use this to include an animated gif in your email and choose from various options.
Each of these is editable within its block. Drag and drop the desired element into your email content section to use them. To create the perfect campaign, experiment with all the options in the designer. There's almost no limit to what this tool can do!
Keep words together with a nonbreaking space
A nonbreaking space is a space that never breaks across two lines. The words on each side always stay together on the same line.
Use it between:
- A number and its unit or currency, for example
10 %or25 $. - A first name and a last name.
- The parts of a date, for example
15 October. - In French text, a word and the punctuation that follows it (before
:,;,!and?), and the text inside French quotation marks « ».
To insert one:
- Click in a text block to open the text toolbar.
- Place the cursor where the space goes. If a regular space is already there, delete it first.
- Click the Nonbreaking space button (icon ⎵). It sits between the special character button (Ω) and the clear formatting button.
Revert to a previous version of a campaign
A previous version of your email can be restored. In the designer, click on the "clock" icon at the bottom left of your campaign. You can then revert to a specific action in editing.
Preview mode
You can preview the site in desktop and mobile mode by clicking on the Eye icon button found at the top right of the designer. Test your content on both platforms and make sure it looks good.
Save changes to the campaign.
Always click the green Save button when modifying your campaign in the email designer. Better safe than sorry!
Save campaign as template, reset it, or abandon it
If you want to choose one of these options, click on the arrow button at the top right of the screen. You can learn more about saving campaigns as templates.
Campaign details
If you're satisfied with your template and want to send it, click Continue in the upper right corner of the designer. The Campaign Details section provides you with these options to send the campaign.
You can set the following here:
-
Your campaign name
-
The subscriber list
-
The segment in that audience,
-
The sender name
-
The sender email address
-
The subject line
You can also review the campaign with a test email and schedule delivery by selecting Send Date and Time.
Remember to test it thoroughly before emailing. Here's a checklist of things to do before sending a campaign and after it's been sent.
Troubleshooting
Email designer won't load
- Clear browser cache and cookies
- Use Chrome or Firefox for best compatibility
- Disable ad blockers and browser extensions
Changes won't save
- Click the green Save button frequently
- Check internet connection stability
- Look for auto-save confirmation messages
Mobile preview issues
- Use real device testing for accuracy
- Check "Don't stack on mobile" settings
- Adjust column widths for mobile display
Images won't insert
- Upload images to the library first
- Check image file size (max 1MB)
- Verify image dimensions (max 1600x2000px)
Custom HTML not working
- Validate HTML code before inserting
- Remove JavaScript (not supported in emails)
- Use inline CSS instead of external stylesheets
Version history issues
- Version history is limited to recent changes
- Save important versions as templates
- Cannot recover versions older than 30 days
Related Articles
- Creating Campaigns - Start your campaign
- Using Smart Templates - Designer templates
- Managing Your Brand Colors - Apply brand colors
- Adding Merge Tags to a Campaign - Personalize content
- Creating Mobile and Desktop Versions - Responsive design