

Adding Merge Tags to a Campaign
Description
Merge tags are used to insert unique user data, linked to a unique value, from your mailing list into emails. For example, you could include your contacts' names in your email by using the [FirstName] merge tag in your content. They are also known as substitution strings, personalization fields, or personalization tags. To summarize, each time you insert a merge tag in a campaign, it will be replaced by the data stored in the field.
Why It's Important
Including custom fields in your campaigns will help you target your audience more directly and effectively so you keep their attention. Keep in mind, people want to be treated as individuals, which is why personalization is essential to marketing practices. As a result, emails that are personalized are more likely to be opened and clicked. In short, sending personalized emails to the right customer at the right time strengthens customer experiences.
Default Fields
The following default fields are automatically created with all lists, and cannot be modified or deleted:
- Contact ID
- Email address
- Subscription date
These are the default fields available from our system. This default information comes from account information or information that is automatically included in a contact list.
In list settings, attributes can be added, and you can also collect information via your form linked to that list. These attributes will be visible in the generated form after adding them.
Step-by-Step Instructions
Using a Custom Field in a Campaign
Once a custom field exists on your list, you can insert its value in the campaign subject line or anywhere in the email content. There are two ways to do it: let the email designer insert the tag for you, or write the tag yourself in the HTML.
1. In the interface
This is the safest method — the designer inserts the tag spelled exactly as the field is named, so there is nothing to mistype.
-
Open your campaign, then click Edit email to open the email designer.
-
Click the text block where the personalized value should appear, and place your cursor at the exact insertion point.
-
In the block toolbar, click Merge tags.

-
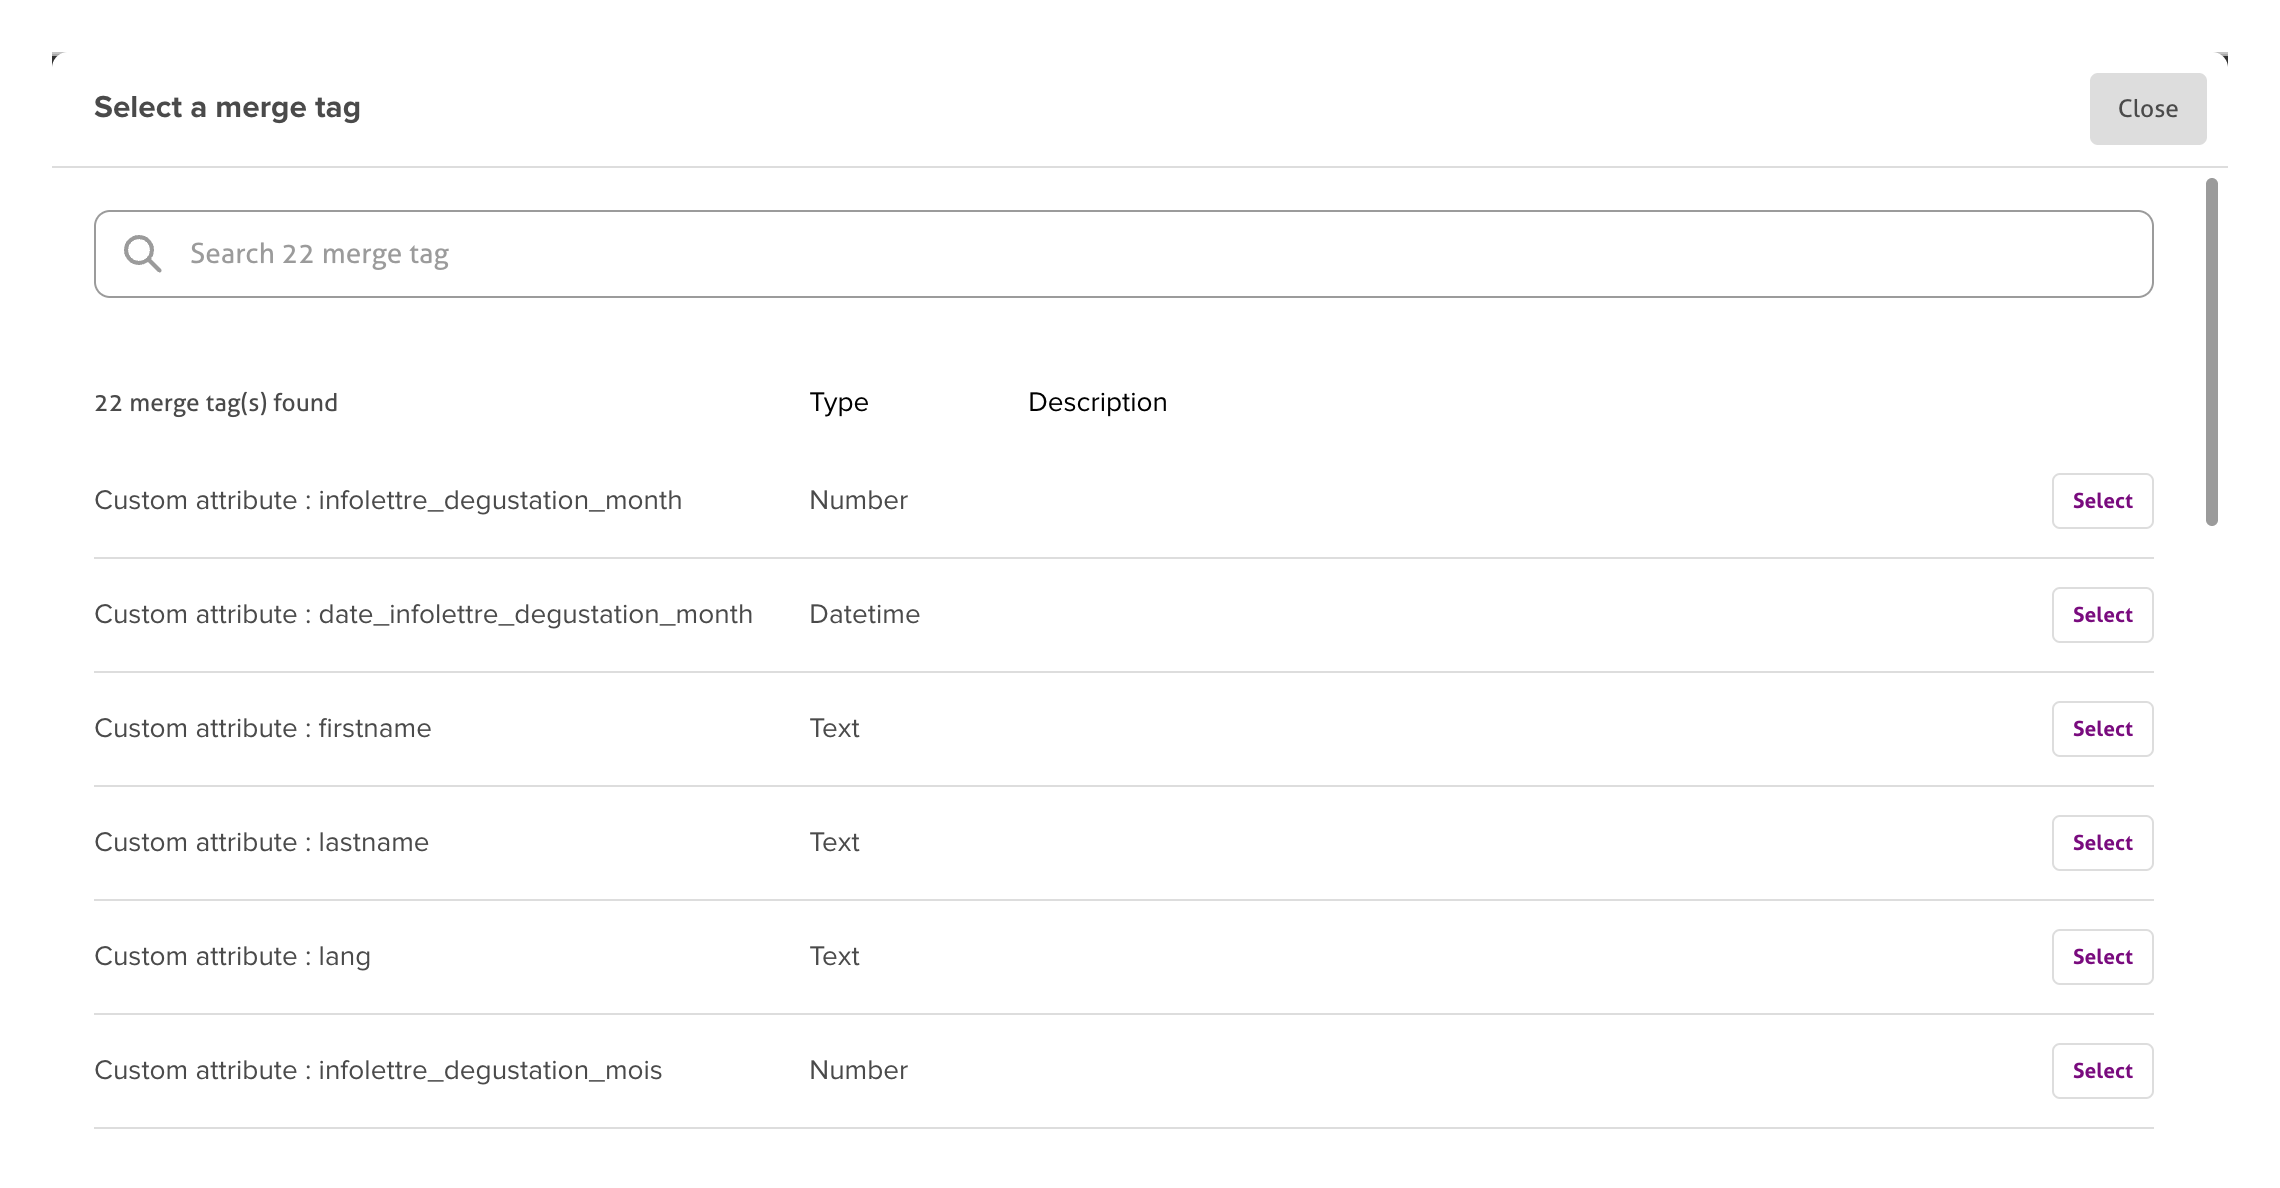
In the Select a merge tag window, locate the field you need. The custom fields of your list appear as Custom attribute : field_name, each with its type — Text, Number, or Datetime. Use the search box to filter a long list.
-
Click Select next to the field. The tag is inserted at your cursor position.
The picker is available in the designer's text blocks. To personalize the subject line, type the tag yourself, as described below.
2. In the HTML code
When you write or edit your email as HTML — an HTML content block, the source-code view, or a template you paste in — you add the tag by hand. A merge tag is the field name between square brackets, and it works anywhere in the HTML: in visible text, in an attribute, or inside a URL.
Code
Please remember to match the tag exactly to the field name.
"Hello [FirstName], Here's your weekly update!"
would become:
"Hello John, Here's your weekly update!"
You can also use the [email] tag, which will take the recipient's email address and insert it into the campaign:
"This email was sent to [email], as requested."
would become:
"This email was sent to email@domain.com, as requested."
You can also use fallback fields if no data is currently available.
Adding Custom Fields
- Select Audience, then Lists
- Select the list you want in the menu
- Click on the gear wheel in the right menu
- You will now see the Manage Contact Attributes options menu Upon signup, the default fields (Contact ID, Email, Signup Date) are automatically created and added here based on your account registration information. The system uses them to track subscriber information and cannot be deleted or modified.
- There is also a field that was created when the list was made
- Create a new field by clicking Enter attribute name and selecting the Value Type
- Click save (Custom fields cannot contain punctuation marks, special characters, or spaces.)
- Depending on the field type, you can name and select a field type:
- Text – Names and other text information (Field name and field content cannot exceed 255 characters, including spaces), phone numbers, etc.
- Number – ID number, age, etc.
- DateTime – Birthday, wedding anniversary, etc.
Other Tags You Can Use
Besides your own custom fields, the platform provides ready-made tags that pull information from the campaign, the sender, your organization, and the list.
Campaign Information
The information for these tags comes from the campaign information you entered when creating your campaign.
The following tags can be used:
[SUBJECT] "Hello, This email is about [SUBJECT]"
Sender Information
The information for these tags comes from the details filled in the account section.
"This email was sent by [SENDER_NAME]" [SENDER_EMAIL]
"For more information, please email [SENDER_EMAIL]"
Client Information
The information for these tags comes from the details filled when creating your account. To modify the information, in the left menu, go to Settings, then Organization Profile.
The following tags can be used:
[CLIENTS.COMPANY_NAME]
[CLIENTS.ADDRESS]
Your physical address must appear in all emails sent via an email marketing service provider to be CAN SPAM compliant.
[CLIENTS.CITY]
[CLIENTS.PROVINCE]
[CLIENTS.POSTAL_CODE]
[CLIENTS.COUNTRY]
[CLIENTS.WEBSITE]
[CLIENTS.PHONE]
These tags can be used as part of your email footer to provide the recipient with information about who is sending them emails (this is mandatory as part of our Terms of Use):
"This message was sent from [CLIENTS.COMPANY_NAME],[CLIENTS.ADDRESS]"
which would read as:
"This message was sent from My Company, 123 Michigan Avenue, Detroit, MI, USA"
List Information
Adds list information to the campaign. To modify, access your list and change the details.
The following tags can be used:
[LISTNAME]
"You are receiving this email because you are part of our [LISTNAME] list"
Actions
These tags allow readers to share your campaign with others, view the email in a browser window, and use various subscription and unsubscription options. These tags can be added as part of your email header or footer.
The following tags can be used:
[FORWARD]
Allows a subscriber to forward the campaign to a friend
[SUBSCRIBE]
Allows someone to subscribe to your list – useful for forwarded emails
[UNSUBSCRIBE]
Allows a subscriber to unsubscribe from your list
[GLOBAL_UNSUBSCRIBE]
Allows a subscriber to unsubscribe from all lists in your account
[SHOWEMAIL]
Used in an email where you want to allow subscribers to view an HTML version of the email in a browser window. This is often useful for situations where images might not be displayed, or people might receive a text email by default.
Date
You can insert a dynamic date into your campaign or subject line using the [DATE] merge field. Here's how it can be used.
[DATE|0|format]
For more information, please refer to the dedicated article.
Using Merge Fields as Part of a Link
You can use merge fields as part of a custom Google Analytics link that incorporates user information. This way, your marketing department gets highly specific tracking results.
Here's how:
- Take your Google Analytics tracking link, for example: http://www.mydomain.com/?utmsource=newsletter&utmmedium=email&utm_campaign=septembernews
- To track traffic based on company name, you would take the [CLIENTS.COMPANY_NAME] tag and insert it into your link: http://www.domain.com/?utmsource=**[CLIENTS.COMPANY_NAME]**&utmmedium=email&utmcampaign=septembernews
- When this campaign is sent, the URL will look like: http://www.domain.com/?utmsource=MyCompanyName&utmmedium=email&utm_campaign=septembernews
- If you want to see site traffic sources by individual email address: http://www.domain.com/?utmsource=[email]&utmmedium=email&utm_campaign=septembernews
- When this campaign is sent, the URL will look like: http://www.domain.com/?utmsource=hello@myemail.com&utmmedium=email&utm_campaign=septembernews
This data will appear in your Google Analytics account under "Traffic Sources."
Troubleshooting
Merge tags display as plain text instead of data
- Check that merge tag syntax matches exactly (case sensitive)
- Verify that brackets are used correctly [TagName]
- Ensure there are no spaces or special characters within brackets
- Confirm that the attribute exists in your contact list
Some contacts show blank spaces instead of personalized data
- Check if those contacts have data in the specified field
- Add fallback values to handle empty fields
- Verify that data was properly imported for all contacts
- Review if certain characters in data are causing issues
Merge tags don't work in subject lines
- Confirm your plan supports merge tags in subject lines
- Use the same exact syntax as in the email body
- Test with preview before sending to entire list
- Check if special characters in data affect subject line display
Custom attributes don't appear as merge tags
- Ensure attributes are saved after creation
- Check that attribute names don't contain spaces or special characters
- Verify you're using the internal field name, not display name
- Refresh the campaign editor after adding new attributes
Related Articles
- Using Merge Tags and Fallbacks - Merge tag guide
- Adding Attributes to Your List - Creating merge fields
- Adding a Date Merge Tag - Date formatting
- Using the Email Designer - Inserting merge tags
- Using Dynamic Content - Advanced personalization