

Creating Landing Pages
Plan availability
Landing pages are available on the Premium plan.
Why this matters
A landing page is a standalone web page built around a single goal, such as a newsletter sign-up, an event registration, or a gated download. Because it removes the distractions of a full website and focuses visitors on one action, it usually converts far better than a generic page. Your landing page is hosted for you, so you get a public link to share right away, no website required.
Before you start
- Create your tags and interests first. If your page's form should add tags or assign interests, create them in your list before you build the page. They have to already exist on the list to be available.
- Know which list the page feeds. Form submissions are stored in the linked list.
Creating your landing page
-
In the left menu, go to Audience Building ▸ Landing Pages.
-
Create a new landing page and pick a template to start from.
-
Click Edit to open the designer.
-
Build the page: drag content blocks onto it and remove anything you don't need. Available blocks include text, images, buttons, forms, videos (YouTube, Vimeo, and others), social links, dividers, custom HTML, and a menu for one-page navigation.
-
Turn on Smart branding to apply your brand colors automatically (you'll see the result in Full Preview).
-
Click Publish to make your page live. Republish every time you change it: saved changes only go live once you publish again.
Page settings
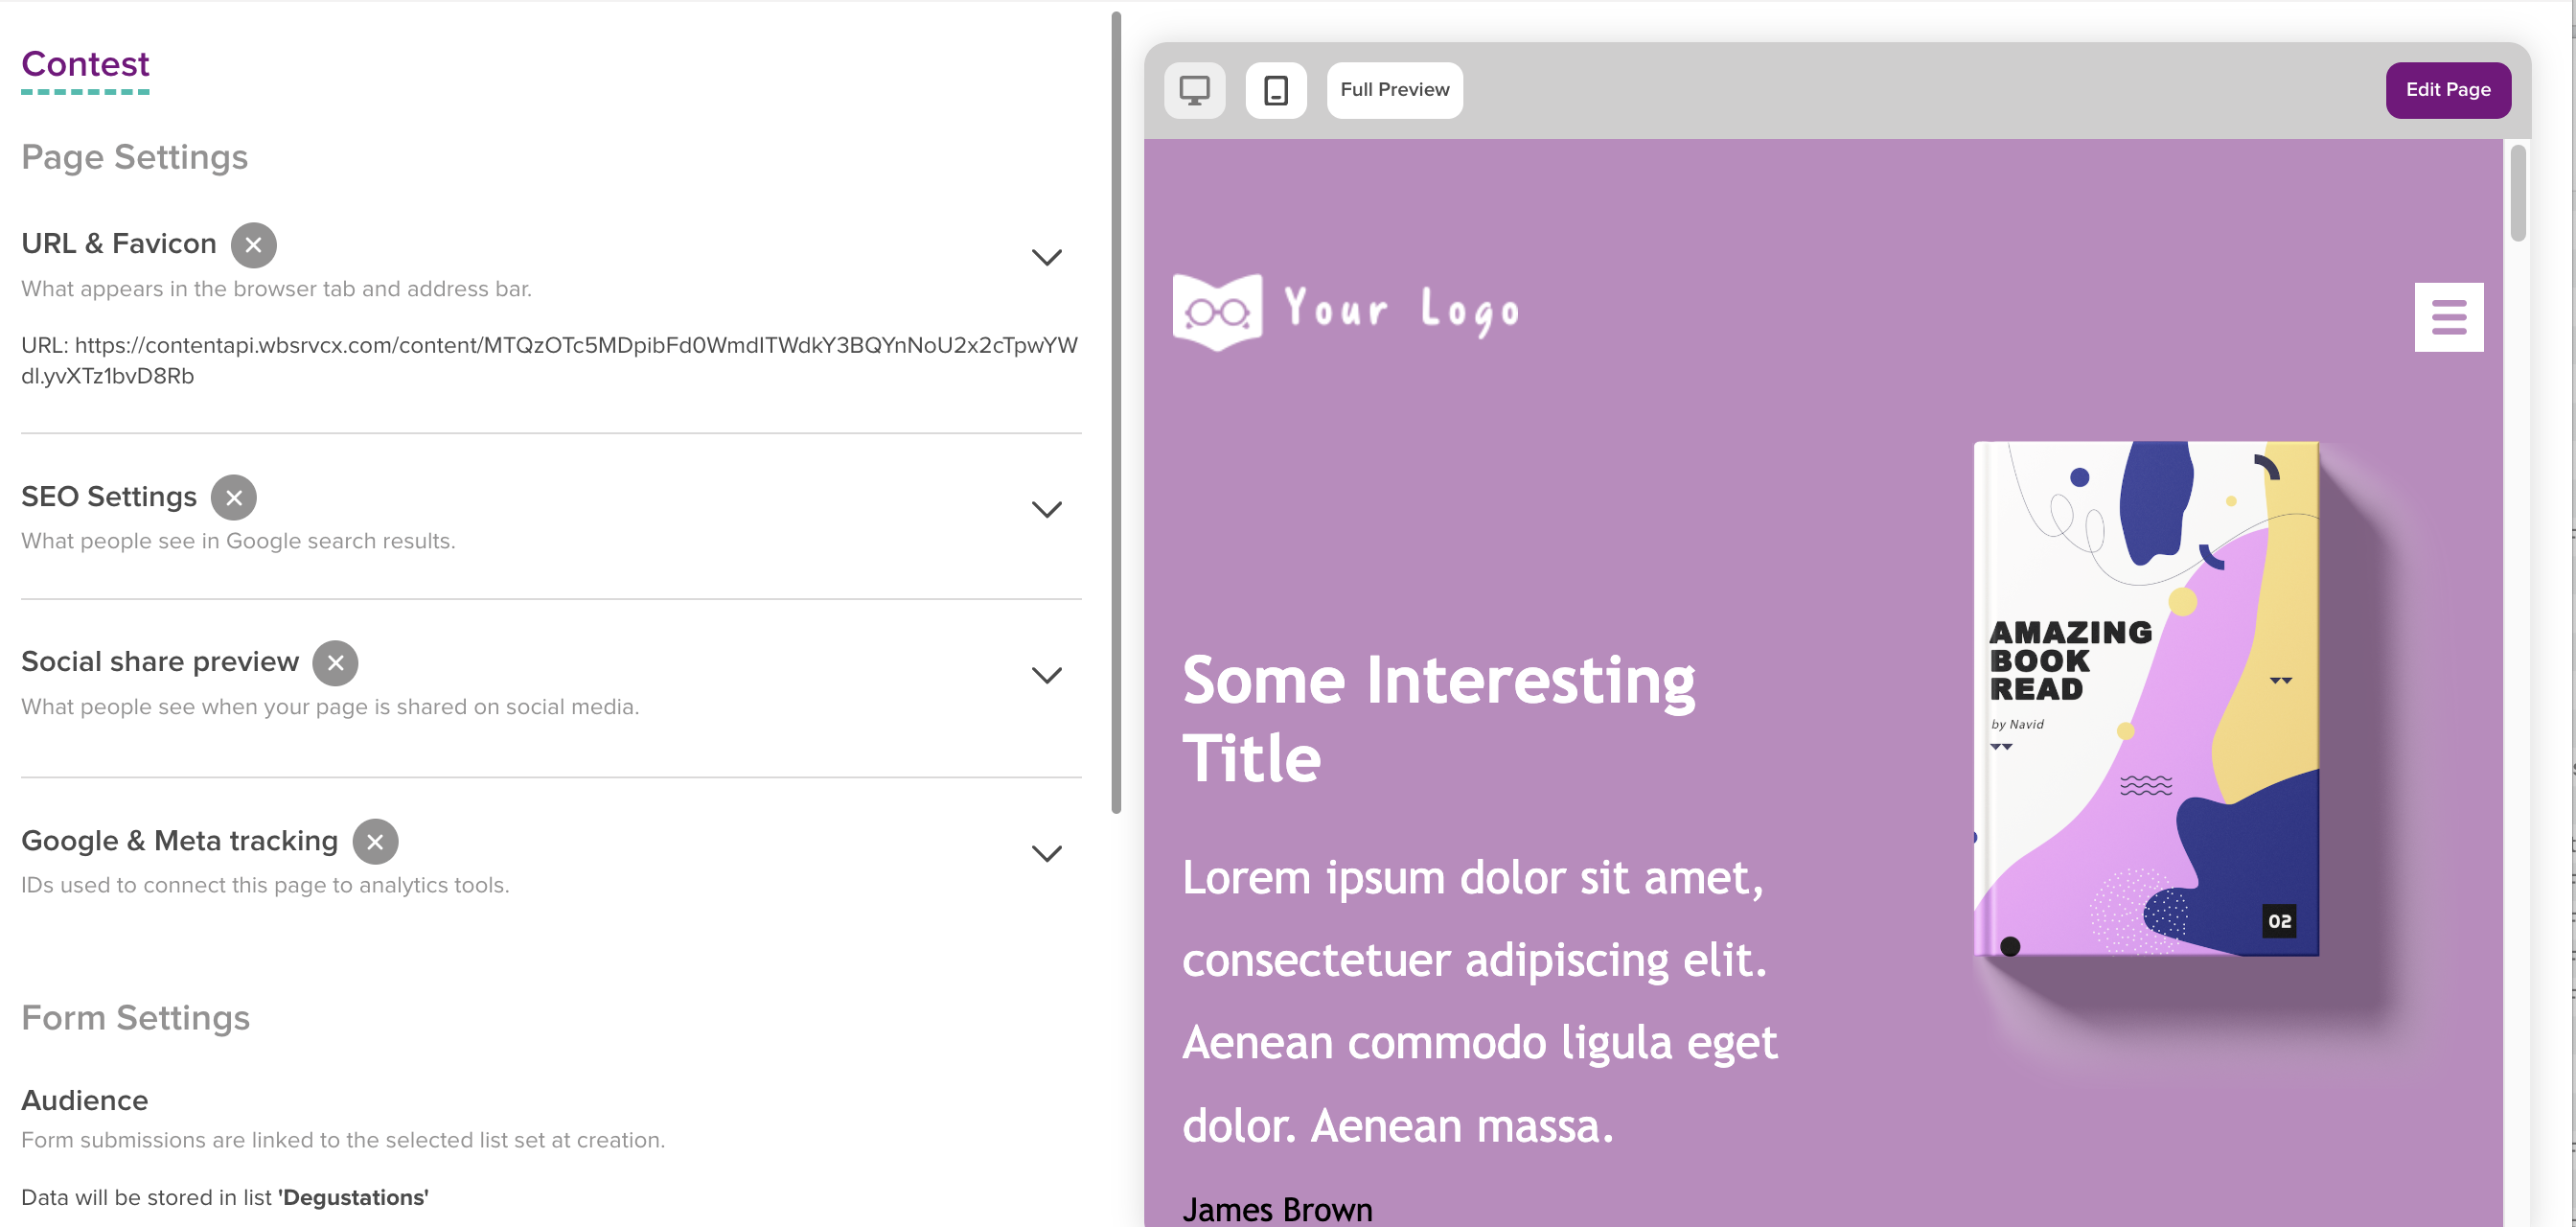
Your landing page is hosted on our servers and has its own public address. In the page settings, you can configure:
- URL & Favicon: what appears in the browser tab and the address bar (your page's link and its favicon).
- SEO Settings: what appears when your page is found through search engines.
- Social share preview: what people see when your page is shared on social media.
- Google & Meta tracking: connect your page to your tracking tools to measure its performance.
- Custom domain: serve your landing page from your own web address instead of the default hosted link. In URL & Favicon, open the Custom domain selector and choose one of your authenticated domains — the same list as Settings ▸ Domains, so the domain must be added and verified there first (use Manage domains in the selector to jump there). See Authenticating your domain.
The form on your page
A landing page can include a subscription form. Choosing its fields and its settings (Audience, double opt-in, redirections) works exactly like a standalone form.
- For the fields and form settings, see Creating a form.
- To protect the form from bots, see Configuring reCAPTCHA on your forms.
Preview and test
Switch between desktop and mobile preview to check both, then subscribe yourself to confirm the whole flow works, including the confirmation email and any redirection.
Reports
Once your landing page is live, the Reports tab shows how it performs. Open your page and switch from Page to Reports, then choose a period (for example, Last 30 Days) — each figure is compared against the previous period. Use Refresh, Export, or Add Filter to adjust the view.
Key engagement metrics summarize the selected period:
- Page views - total views, with Unique visitors, New visitors, and Returning.
- Engagement - total clicks, plus scroll milestones (Scroll ≥ 50%, Scroll ≥ 75%, Scroll 100%).
- Conversions - form submits, Conversion rate, Click-through rate, and Drop-off.
- Top source - where most of your traffic comes from.
Further down, more detailed views break performance down:
- Traffic over time - a trend you can view Daily or Weekly.
- Traffic by source - Converted vs Visited only for each source.
- Conversion funnel - the end-to-end path from visit to conversion.
- Scroll depth - the share of visitors reaching 25%, 50%, 75%, and 100%.
- Audience breakdown - grouped by Devices, Browsers, or Top elements.
Troubleshooting
My changes aren't showing on the live page
- Click Publish, and republish after every change.
My page looks wrong on mobile
- Use the mobile preview and adjust the layout for smaller screens.
My tags or interests aren't available in the form
- They must be created in the list before building the page.
Related articles
- Creating a form - The form on your page
- Configuring reCAPTCHA on your forms - Block bots
- Creating pop-ups - Conversion-focused pop-ups
- Create and manage a contact list - Where submissions go