

Configuring and Personalizing Opt-In Emails
Why this matters
An opt-in email is the confirmation message sent automatically when someone subscribes through a double opt-in form. It confirms the subscriber's consent, keeps your list clean, and protects your deliverability. You can choose which email is sent for each language, who it comes from, and personalize its design.
Each opt-in email needs a sender
The Audience Building ▸ Opt-In Emails page lists every opt-in email on your account, with the Sender it is sent from and the Language it applies to. You set up one opt-in email per language, and each one must have a sender configured and applied here — otherwise the confirmation message can't be sent, and new subscribers are never confirmed or added to your list.
The Sender is the verified "From" identity recipients see on the confirmation email (its name, address, and Sender ID). It must be a sender you have already added and authenticated; you then select it and apply it to each opt-in email (see the steps below).
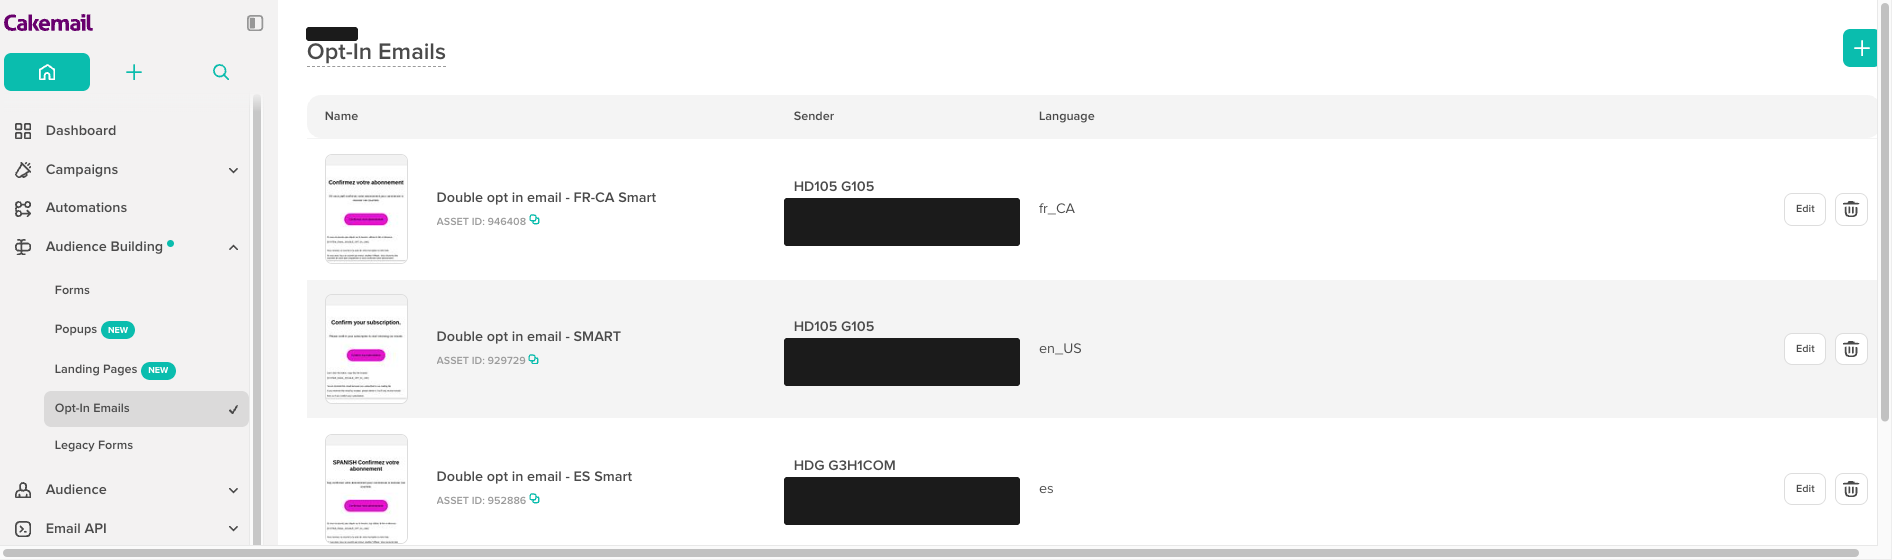
Configure an opt-in email
In the left menu, go to Audience Building ▸ Opt-In Emails, then open the email you want to set up. The Edit Custom Email dialog opens. Fill in:
-
Email Type: the type of email, for example Double Opt-In Email.
-
Language: the language this email applies to (for example French (Canada)). You can configure a different opt-in email for each language you use.
-
Sender: the verified sender the email is sent from (for example Jeanine Rose). See Adding a sender.
-
Template: the template used for this email (for example Double opt in email - FR-CA Smart).
-
Click Save.
Personalize the template
The Template field controls how your opt-in email looks. To go beyond the default and create your own version, you duplicate a double opt-in template. This is the only way to create a personalized opt-in template.
You must take the template from Resources ▸ My Email Templates. This is the only place where you can get a template to use as an opt-in email.
Before you start: choose the right template to duplicate
You must start from a template that has the tag System Emails: Contact Double Opt_in. Only a template with this tag can be used as an opt-in email, and only a duplicate keeps the tag.
To check a template:
- Go to Resources ▸ My Email Templates.
- At the top right of the page, open the dropdown and select All Templates. By default, the list shows only My Templates, and the double opt-in templates provided do not appear there.
- Open the template.
- Look at the Tags table, on the Usage line:
- ✅ Usage shows System Emails: Contact Double Opt_in: you can duplicate this template.
- ❌ Usage is empty, shows Add Tags, or shows a different tag: do not use this template. Its copy will not appear in the Template list of your opt-in email, and you cannot add the tag yourself.
You can start from one of the default double opt-in templates (for example Double opt in email - SMART), or from one of your own copies that still has the tag.
Keep the tag on your template at all times
The tag System Emails: Contact Double Opt_in must stay on your template for as long as you use it as an opt-in email.
- Never use Save Copy To Template to create your opt-in template. The new template loses its tags, and you cannot add them back.
- Do not start from a blank template or from a regular campaign template: they do not have the tag.
- If the tag is missing, the template disappears from the Template list of your opt-in email. You must start again from a template that has the tag.
Create your personalized opt-in template
-
In the left menu, go to Resources ▸ My Email Templates.
-
At the top right of the page, open the dropdown and select All Templates. By default, the list shows only My Templates, and the double opt-in templates provided do not appear there.
-
Find a template whose Usage line shows System Emails: Contact Double Opt_in (see Before you start).
-
On the row of this template, open the actions menu and click Duplicate.
-
Open the copy and check the Tags table: the Usage line must show System Emails: Contact Double Opt_in. You can rename the copy; renaming does not remove the tag.
-
Adjust the wording and design to match your brand. Your Brand Kit colors apply, so the email stays consistent with your other campaigns.
-
Identify what the person is subscribing to. Make it clear which service or list they signed up for, so they recognize the request and confirm with confidence.
-
Leave every merge tag in place — above all the confirmation link
[SYSTEM_EMAIL_DOUBLE_OPT_IN_LINK](see below). Deleting a merge tag while you edit is the most common way to break an opt-in email. -
Save your changes. Then open the template again and check that its Usage line still shows System Emails: Contact Double Opt_in.
-
Back in Edit Custom Email, select your personalized template in the Template field and click Save.
Double opt-in: keep the confirmation link exactly as it is
For a Double Opt-In Email, the confirmation link must be present, using exactly this merge tag:
Code
This is what lets a subscriber confirm their subscription. If this merge tag is missing, removed, or changed when you personalize the template, confirmation will not work and new contacts will not be added to your list. Always keep [SYSTEM_EMAIL_DOUBLE_OPT_IN_LINK] in your personalized version.
Troubleshooting
My template does not appear in the Template list of my opt-in email
- Open the template and check the Usage line of the Tags table. If it does not show System Emails: Contact Double Opt_in, the template cannot be used as an opt-in email, and you cannot add the tag back.
- This happens when the template was created with Save Copy To Template, or from a blank or regular campaign template.
- Start again: duplicate a template that has the tag (Resources ▸ My Email Templates, dropdown at the top right ▸ All Templates, then actions menu ▸ Duplicate) and redo your changes on the copy.
My personalized opt-in email isn't confirming subscribers
- Check that the
[SYSTEM_EMAIL_DOUBLE_OPT_IN_LINK]tag is still present and unchanged in your template. - Confirm the correct Template is selected in Edit Custom Email for that Language.
- Verify the Sender is a verified, authenticated sender.
The wrong language email is being sent
- Make sure you configured an opt-in email for each Language your contacts use.
- Check the contact's language; it determines which opt-in email they receive.
Related articles
- Adding a sender - Set up the sender for your opt-in email
- Managing your email templates - Edit and organize templates
- Default sender address and language - List defaults
- Subscription confirmation email campaign - Re-confirm an existing list
- Creating a form - Where double opt-in starts