

Creating Pop-ups
Plan availability
Pop-ups are available on the Premium plan.
Why this matters
A pop-up captures a visitor's attention at the right moment and invites them to subscribe. Shown thoughtfully, with a clear offer, it can grow your list noticeably without redesigning your website.
Before you start
- Create your tags and interests first. If your pop-up's form should add tags or assign interests, create them in your list before you build the pop-up. They have to already exist on the list to be available.
- Know which list the pop-up feeds. Submissions are stored in the list linked to the form.
Creating your pop-up
-
In the left menu, go to Audience Building ▸ Pop-ups.
-
Create a new pop-up and pick a template to start from.
-
Click Edit to open the designer.
-
Build the content: drag blocks onto the pop-up and remove anything you don't need. Keep it focused; you want an action, not a distraction.
-
Turn on Smart branding to apply your brand colors (you'll see the result in Full Preview).
-
Click Publish to make your pop-up live. Republish every time you change it: saved changes only go live once you publish again.
Choosing when and where it appears
In the pop-up settings panel, control how the pop-up behaves:
- Position: where the pop-up appears on the screen (for example, center).
- Trigger: when and how the pop-up is shown (for example, when a visitor tries to leave the page) and how often it displays.
- Overlay Tint: the color and opacity of the dimmed background shown behind the pop-up.
- Close Button: the color and position of the pop-up's close button.
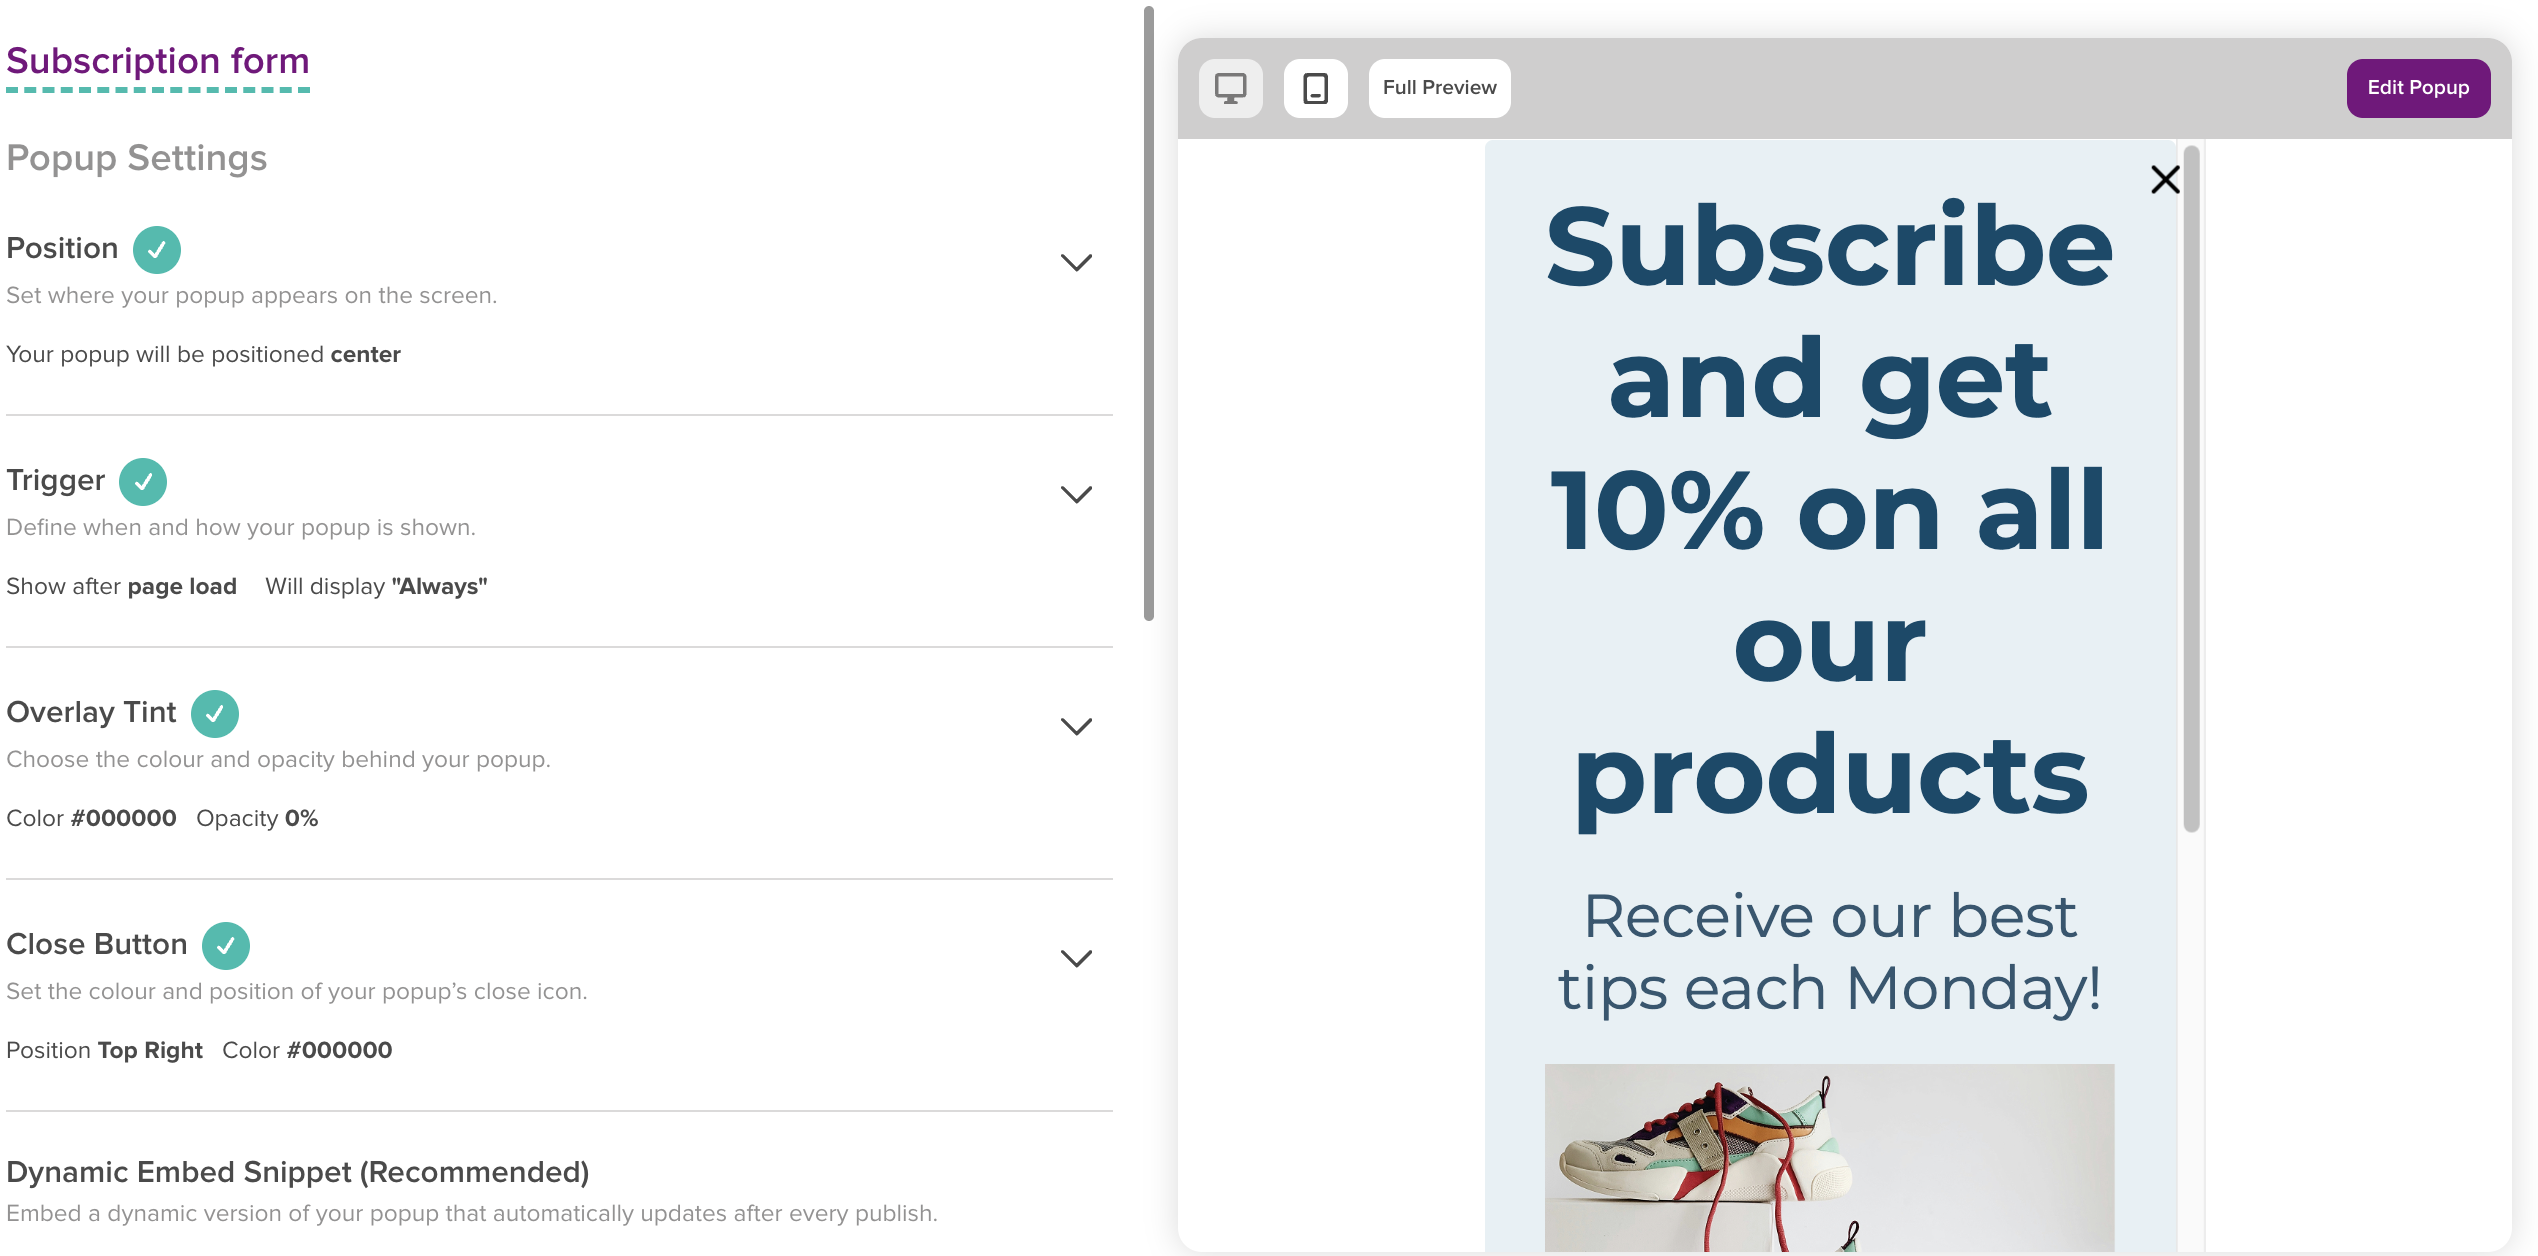
The form inside your pop-up
A pop-up contains a subscription form. Choosing its fields and its settings (Audience, double opt-in, redirections) works exactly like a standalone form.
- For the fields and form settings, see Creating a form.
- To protect the form from bots, see Configuring reCAPTCHA on your forms.
Publishing and embedding
- Dynamic Embed Snippet (recommended): paste this code into your website. It updates automatically every time you publish.
- Static HTML Code (for developers): a static version you can modify yourself.
Preview and test
Switch between desktop and mobile preview to check both, then subscribe yourself to confirm the whole flow works, including the confirmation email.
Reports
Once your pop-up is live, the Reports tab shows how it performs. Open your pop-up and switch from Popup to Reports, then choose a period (for example, Last 30 Days) — each figure is compared against the previous period. Use Refresh, Export, or Add Filter to adjust the view.
Key engagement metrics summarize the selected period:
- Popup views - total views, with Unique visitors, New visitors, and Returning.
- Engagement - total clicks and Click-through rate.
- Conversions - conversions, Conversion rate, and Drop-off.
- Top source - where most of your traffic comes from.
Further down, more detailed views break performance down:
- Popup views over time - a trend you can view Daily or Weekly.
- Popup traffic by source - Converted vs Viewed only for each source.
- Conversion funnel - the end-to-end path from view to conversion.
- Popup audience breakdown - grouped by Devices, Browsers, or Top elements.
Troubleshooting
My pop-up isn't appearing on my site
- Make sure you clicked Publish (and republished after your latest change).
- Confirm the embed snippet is in place on your site.
- Check the Trigger settings; the pop-up may be waiting for a condition (such as exit intent) or capped by its display frequency.
- Clear your browser cache and test in a private window.
My tags or interests aren't available
- They must be created in the list before building the pop-up.
Related articles
- Creating a form - The form inside your pop-up
- Configuring reCAPTCHA on your forms - Block bots
- Creating landing pages - Full standalone pages
- Create and manage a contact list - Where submissions go