An action is an entity that performs an action, like sending an email, based on conditions. In the first release of the Automation API, Cakemail only supports the action of sending an email and the conditions of a parent action to be sent, opened or clicked.
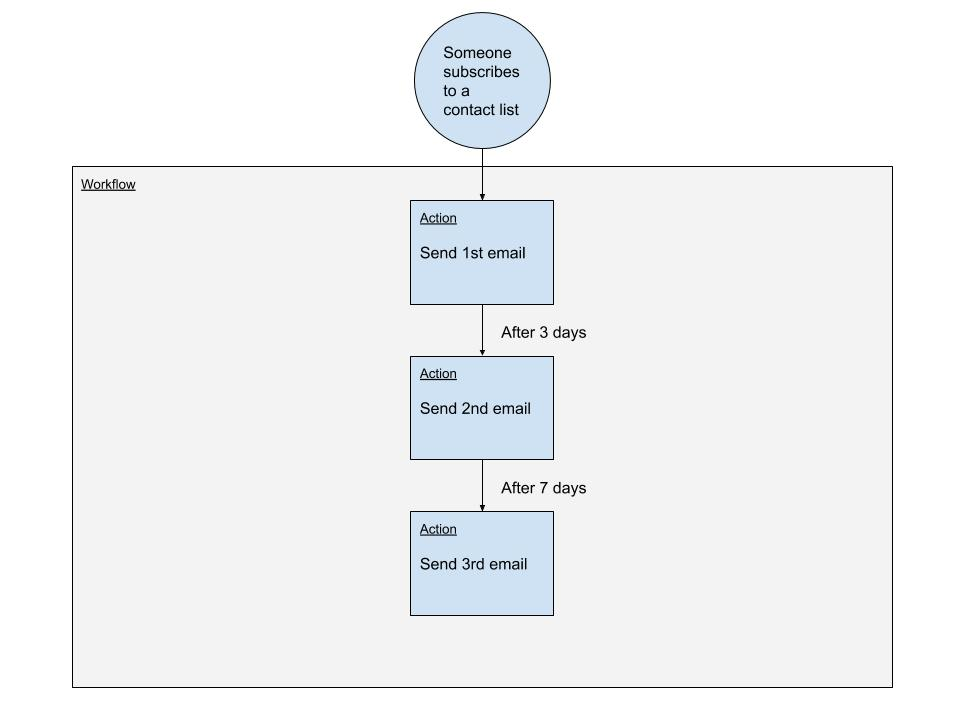
Here is an example of a series of emails to be sent when someone subscribes to a contact list.
The first step in setting a new automation is to create a Workflow. To create your first workflow, you will call the Create a workflow endpoint along with basic information like a name, a goal and a description as well as define your target audience.
curl --request POST \ --url https://api.cakemail.dev/workflows \ --header 'Accept: application/json' \ --header 'authorization: Bearer [access token]' \ --header 'Content-Type: application/json' \ --data '{"audience":{"list_id":[list ID]},"name":"[name of the workflow]","goal":"[goal of the workflow]","trigger":"subscribed"}'
The first action of the workflow is special, it is the only action that doesn't have a parent. It will be triggered by the workflow itself. To create your first action, you will call the Create an action along with all the information required by an action.
curl --request POST \ --url https://api.cakemail.dev/workflows/[workflow ID]/actions \ --header 'Accept: application/json' \ --header 'authorization: Bearer [access token]' \ --header 'Content-Type: application/json' \ --data '{"email_settings":{"sender":{"id":"[contact list ID]"},"tracking":{"opens":true,"clicks_html":true,"clicks_text":true},"content":{"subject":"[subject]","html":"[HTML content]","type":"html","encoding":"utf-8"}},"name":"[name of the action]","condition":"none","delay":0,"type":"email"}'
This call will return you an action object. Now that you have your first action, you can start building your workflow by adding a second action that will take the ID of the first action as its parent_id parameter.
curl --request POST \ --url https://api.cakemail.dev/workflows/[workflow ID]/actions \ --header 'Accept: application/json' \ --header 'authorization: Bearer [access token]' \ --header 'Content-Type: application/json' \ --data '{"email_settings":{"sender":{"id":"[contact list ID]"},"tracking":{"opens":true,"clicks_html":true,"clicks_text":true},"content":{"subject":"[subject]","html":"[HTML content]","type":"html","encoding":"utf-8"}},"name":"[name of the action]","parent_id":"[previous action ID]",condition":"none","delay":259200,"type":"email"}'
When a workflow is created, it is deactivated by default. That's to leave you the time to add all the actions before it gets triggered for the first time. To activate your workflow, you will call the Activate a workflow endpoint along with the ID of the workflow that was returned earlier in the workflow object.
curl --request POST \ --url https://api.cakemail.dev/workflows/[workflow ID]/activate \ --header 'Accept: application/json'--header 'authorization: Bearer [access token]' \Your workflow is now ready to start sending emails. You can test it by subscribing to the contact list you defined in the audience above.